Deploying a Flask application to Elastic Beanstalk
Flask is an open source web application framework for Python. This tutorial walks you through the process of generating a Flask application and deploying it to an AWS Elastic Beanstalk environment.
In this tutorial, you’ll do the following:
Prerequisites
This tutorial assumes you have knowledge of the basic Elastic Beanstalk operations and the Elastic Beanstalk console. If you haven't already, follow the instructions in Getting started using Elastic Beanstalk to launch your first Elastic Beanstalk environment.
To follow the procedures in this guide, you will need a command line terminal or shell to run commands. Commands are shown in listings preceded by a prompt symbol ($) and the name of the current directory, when appropriate.
~/eb-project$ this is a command
this is output
On Linux and macOS, you can use your preferred shell and package manager. On Windows 10, you can install the Windows Subsystem for Linux
Flask requires Python 3.7 or later. In this tutorial we use Python 3.7 and the corresponding Elastic Beanstalk platform version. Install Python by following the instructions at Setting up your Python development environment.
The Flask
This tutorial also uses the Elastic Beanstalk Command Line Interface (EB CLI). For details on installing and configuring the EB CLI, see Install the EB CLI and Configure the EB CLI.
Set up a Python virtual environment with Flask
Create a project directory and virtual environment for your application, and install Flask.
To set up your project environment
-
Create a project directory.
~$mkdir eb-flask~$cd eb-flask -
Create and activate a virtual environment named
virt:~/eb-flask$virtualenv virt~$source virt/bin/activate(virt) ~/eb-flask$You will see
(virt)prepended to your command prompt, indicating that you're in a virtual environment. Use the virtual environment for the rest of this tutorial. -
Install Flask with
pip install:(virt)~/eb-flask$pip install flask==2.0.3 -
View the installed libraries with
pip freeze:(virt)~/eb-flask$pip freezeclick==8.1.1 Flask==2.0.3 itsdangerous==2.1.2 Jinja2==3.1.1 MarkupSafe==2.1.1 Werkzeug==2.1.0This command lists all of the packages installed in your virtual environment. Because you are in a virtual environment, globally installed packages like the EB CLI are not shown.
-
Save the output from
pip freezeto a file namedrequirements.txt.(virt)~/eb-flask$pip freeze > requirements.txtThis file tells Elastic Beanstalk to install the libraries during deployment. For more information, see Specifying dependencies using a requirements file.
Create a Flask application
Next, create an application that you'll deploy using Elastic Beanstalk. We'll create a "Hello World" RESTful web service.
Create a new text file in this directory named application.py with the following contents:
Example ~/eb-flask/application.py
from flask import Flask

# print a nice greeting.
def say_hello(username = "World"):
    return '<p>Hello %s!</p>\n' % username

# some bits of text for the page.
header_text = '''
    <html>\n<head> <title>EB Flask Test</title> </head>\n<body>'''
instructions = '''
    <p><em>Hint</em>: This is a RESTful web service! Append a username
    to the URL (for example: <code>/Thelonious</code>) to say hello to
    someone specific.</p>\n'''
home_link = '<p><a href="/">Back</a></p>\n'
footer_text = '</body>\n</html>'

# EB looks for an 'application' callable by default.
application = Flask(__name__)

# add a rule for the index page.
application.add_url_rule('/', 'index', (lambda: header_text +
    say_hello() + instructions + footer_text))

# add a rule when the page is accessed with a name appended to the site
# URL.
application.add_url_rule('/<username>', 'hello', (lambda username:
    header_text + say_hello(username) + home_link + footer_text))

# run the app.
if __name__ == "__main__":
    # Setting debug to True enables debug output. This line should be
    # removed before deploying a production app.
    application.debug = True
    application.run()
This example prints a customized greeting that varies based on the path used to access the service.
Note
By adding application.debug = True before running the application, debug output is enabled in case something goes wrong. It's a good
practice for development, but you should remove debug statements in production code, since debug output can reveal internal aspects of your
application.
Using application.py as the filename and providing a callable application object (the Flask object, in this case) allows
Elastic Beanstalk to easily find your application's code.
Run application.py with Python:
(virt) ~/eb-flask$ python application.py
* Serving Flask app "application" (lazy loading)
* Environment: production
WARNING: Do not use the development server in a production environment.
Use a production WSGI server instead.
* Debug mode: on
* Running on http://127.0.0.1:5000/ (Press CTRL+C to quit)
* Restarting with stat
* Debugger is active!
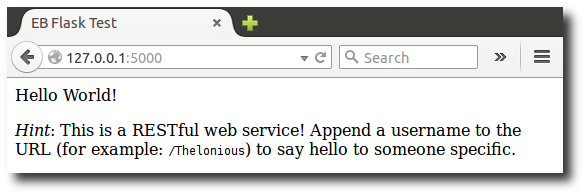
* Debugger PIN: 313-155-123Open http://127.0.0.1:5000/ in your web browser. You should see the application running, showing the index page:
Check the server log to see the output from your request. You can stop the web server and return to your virtual environment by typing Ctrl+C.
If you got debug output instead, fix the errors and make sure the application is running locally before configuring it for Elastic Beanstalk.
Deploy your site with the EB CLI
You've added everything you need to deploy your application on Elastic Beanstalk. Your project directory should now look like this:
~/eb-flask/
|-- virt
|-- application.py
`-- requirements.txt
The virt folder, however, is not required for the application to run on Elastic Beanstalk. When you deploy, Elastic Beanstalk creates a new virtual
environment on the server instances and installs the libraries listed in requirements.txt. To minimize the size of the source bundle
that you upload during deployment, add an .ebignore file that tells the EB CLI to leave out the
virt folder.
Example ~/eb-flask/.ebignore
virt
Next, you'll create your application environment and deploy your configured application with Elastic Beanstalk.
To create an environment and deploy your Flask application
-
Initialize your EB CLI repository with the eb init command:
~/eb-flask$eb init -p python-3.7 flask-tutorial --region us-east-2Application flask-tutorial has been created.This command creates a new application named
flask-tutorialand configures your local repository to create environments with the latest Python 3.7 platform version. -
(optional) Run eb init again to configure a default keypair so that you can connect to the EC2 instance running your application with SSH:
~/eb-flask$eb initDo you want to set up SSH for your instances? (y/n):ySelect a keypair. 1) my-keypair 2) [ Create new KeyPair ]Select a key pair if you have one already, or follow the prompts to create a new one. If you don't see the prompt or need to change your settings later, run eb init -i.
-
Create an environment and deploy your application to it with eb create:
~/eb-flask$eb create flask-env
Environment creation takes about 5 minutes and creates the following resources:
-
EC2 instance – An Amazon Elastic Compute Cloud (Amazon EC2) virtual machine configured to run web apps on the platform that you choose.
Each platform runs a specific set of software, configuration files, and scripts to support a specific language version, framework, web container, or combination of these. Most platforms use either Apache or NGINX as a reverse proxy that sits in front of your web app, forwards requests to it, serves static assets, and generates access and error logs.
-
Instance security group – An Amazon EC2 security group configured to allow inbound traffic on port 80. This resource lets HTTP traffic from the load balancer reach the EC2 instance running your web app. By default, traffic isn't allowed on other ports.
-
Load balancer – An Elastic Load Balancing load balancer configured to distribute requests to the instances running your application. A load balancer also eliminates the need to expose your instances directly to the internet.
-
Load balancer security group – An Amazon EC2 security group configured to allow inbound traffic on port 80. This resource lets HTTP traffic from the internet reach the load balancer. By default, traffic isn't allowed on other ports.
-
Auto Scaling group – An Auto Scaling group configured to replace an instance if it is terminated or becomes unavailable.
-
Amazon S3 bucket – A storage location for your source code, logs, and other artifacts that are created when you use Elastic Beanstalk.
-
Amazon CloudWatch alarms – Two CloudWatch alarms that monitor the load on the instances in your environment and that are triggered if the load is too high or too low. When an alarm is triggered, your Auto Scaling group scales up or down in response.
-
AWS CloudFormation stack – Elastic Beanstalk uses AWS CloudFormation to launch the resources in your environment and propagate configuration changes. The resources are defined in a template that you can view in the AWS CloudFormation console
. -
Domain name – A domain name that routes to your web app in the form
subdomain.region.elasticbeanstalk.com.Note
To augment the security of your Elastic Beanstalk applications, the elasticbeanstalk.com domain is registered in the Public Suffix List (PSL)
. For further security, we recommend that you use cookies with a __Host-prefix if you ever need to set sensitive cookies in the default domain name for your Elastic Beanstalk applications. This practice will help to defend your domain against cross-site request forgery attempts (CSRF). For more information see the Set-Cookiepage in the Mozilla Developer Network.
All of these resources are managed by Elastic Beanstalk. When you terminate your environment, Elastic Beanstalk terminates all the resources that it contains.
Note
The Amazon S3 bucket that Elastic Beanstalk creates is shared between environments and is not deleted during environment termination. For more information, see Using Elastic Beanstalk with Amazon S3.
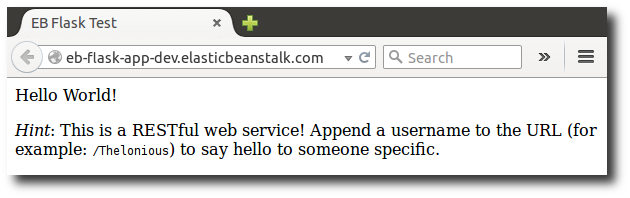
When the environment creation process completes, open your web site with eb open:
~/eb-flask$ eb openThis will open a browser window using the domain name created for your application. You should see the same Flask website that you created and tested locally.
If you don't see your application running, or get an error message, see Troubleshooting Deployments for help with how to determine the cause of the error.
If you do see your application running, then congratulations, you've deployed your first Flask application with Elastic Beanstalk!
Cleanup
When you finish working with Elastic Beanstalk, you can terminate your environment. Elastic Beanstalk terminates all AWS resources associated with your environment, such as Amazon EC2 instances, database instances, load balancers, security groups, and alarms.
To terminate your Elastic Beanstalk environment
Open the Elastic Beanstalk console
, and in the Regions list, select your AWS Region. -
In the navigation pane, choose Environments, and then choose the name of your environment from the list.
Note
If you have many environments, use the search bar to filter the environment list.
-
Choose Actions, and then choose Terminate environment.
-
Use the on-screen dialog box to confirm environment termination.
With Elastic Beanstalk, you can easily create a new environment for your application at any time.
Or, with the EB CLI:
~/eb-flask$ eb terminate flask-envNext steps
For more information about Flask, visit flask.pocoo.org
If you'd like to try out another Python web framework, check out Deploying a Django application to Elastic Beanstalk.
