Step 4: Configure your environment
You can configure your environment to better suit your application. For example, if you have a compute-intensive application, you can change the type of Amazon Elastic Compute Cloud (Amazon EC2) instance that is running your application. To apply configuration changes, Elastic Beanstalk performs an environment update.
Some configuration changes are simple and happen quickly. Some changes require deleting and recreating AWS resources, which can take several minutes. When you change configuration settings, Elastic Beanstalk warns you about potential application downtime.
Make a configuration change
In this example of a configuration change, you edit your environment's capacity settings. You configure a load-balanced, scalable environment that has between two and four Amazon EC2 instances in its Auto Scaling group, and then you verify that the change occurred. Elastic Beanstalk creates an additional Amazon EC2 instance, adding to the single instance that it created initially. Then, Elastic Beanstalk associates both instances with the environment's load balancer. As a result, your application's responsiveness is improved and its availability is increased.
To change your environment's capacity
Open the Elastic Beanstalk console
, and in the Regions list, select your AWS Region. -
In the navigation pane, choose Environments, and then choose the name of your environment from the list.
Note
If you have many environments, use the search bar to filter the environment list.
In the navigation pane, choose Configuration.
-
In the Instance traffic and scaling configuration category, choose Edit.
-
Collapse the Instances section, so you can more easily see the Capacity section. Under Auto Scaling group change Environment type to Load balanced.
-
In the Instances row, change Max to
4, and then change Min to2. -
To save the changes choose Apply at the bottom of the page.
-
A warning tells you that this update replaces all of your current instances. Choose Confirm.
-
The Environment overview page will display, showing the Events tab.
The environment update can take a few minutes. To find out that it's complete, look for the event Successfully deployed new configuration to environment in the event list. This confirms that the Auto Scaling minimum instance count has been set to 2. Elastic Beanstalk automatically launches the second instance.
Verify the configuration change
When the environment update is complete and the environment is ready, verify your change.
To verify the increased capacity
-
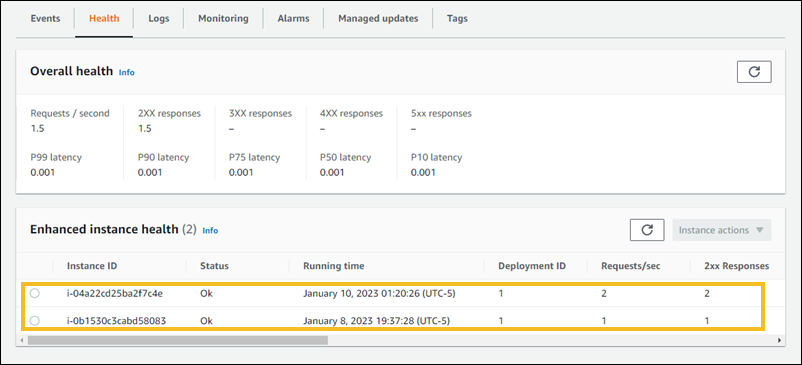
Choose Health from either the tab list or from the left navigation pane.
-
Look at the Enhanced instance health section.
You can see that two Amazon EC2 instances are listed. Your environment capacity has increased to two instances.